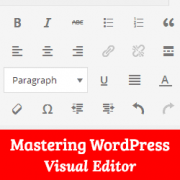
Using the WordPress Visual Editor
Most WordPress users spend more time with WordPress visual editor writing posts than any other part of the admin area. WordPress visual editor allows you to create content in a WYSIWYG (What you see is what you get) environment. It is easy to use, but as a power user you can increase your productivity by learning these lesser-known tricks. In this article, we have gathered 14 tips for mastering the WordPress visual editor. These tips will teach you how to use WordPress visual editor like a pro.
Don’t forget to categorize your blog post if required. Categories can be selected using the tick boxes presented.
Basic Posting From the Dashboard
- Click Posts (left sidebar)
- Click Add New
- Add a title and post content
Select a relevant category (if required) - Click the Publish button (don’t forget to do this!)

The WordPress Visual Editor
WordPress Visual Editor uses a modified version of TinyMCE which is an open source software itself just like WordPress. The WordPress visual editor is extensible meaning you can add more options and buttons into it. We will show you how to do that later in this article.
Tip 1. The Kitchen Sink
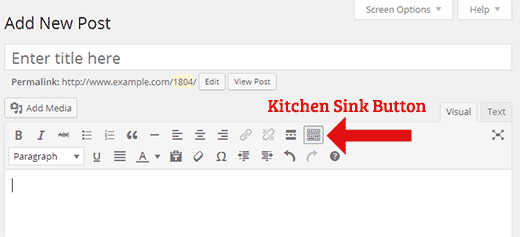
By default the Visual Editor only shows a single row of buttons in the editor. Kitchen Sink is the last button in this row. Clicking on it will display another row of buttons with more buttons.
Tip 2. Master the Keyboard Shortcuts
It is annoying to move the mouse over just to make some text bold or add a link. The visual editor comes with a bunch of useful keyboard shortcuts for the most common formatting tasks.
Using keyboard shortcuts instead of mouse will not only save time but will also make writing easier for you. Check out our guide on the most time-saving keyboard shortcuts in WordPress.
Tip 3. Single and Double Line Spacing
Many beginner level users often find it difficult to figure out how to create paragraphs and line breaks in WordPress. To add a new paragraph in the visual editor you need to press the Enter key. WordPress will add a new paragraph with double line spacing.
If you would like to just enter a line break with single line spacing, then you need to press Shift + Enter keys together. Check out our guide on how to add single/double line spacing in WordPress.
Tip 4. Rearrange the Post Editor Screen
The post editor screen in WordPress does not just have the post editor. It has other sections (known as metaboxes) for many other things such as categories, author, custom fields etc. When writing posts, you probably only use a few of these boxes and rest of them are just sitting there.
A clutter free writing area helps focusing and get more things done. Luckily, WordPress allows you to show and hide items from post edit screen. You can even rearrange them to your own liking. See our beginner’s guide on how to rearrange post edit screen in WordPress.
Tip 5. Using Distraction Free or Full Screen Writing Mode
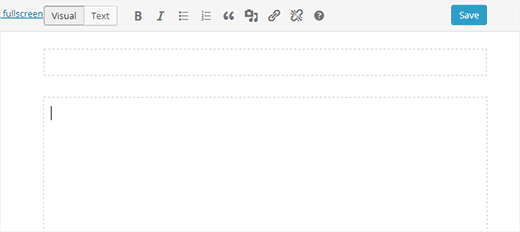
There are times when you need to just focus on writing without any user interface distractions. WordPress comes with a full screen writing mode which offers a distraction free editor. Just click on the full screen button, and your post edit screen will transform into a full screen editor.
Tip 6. Changing Font Size in WordPress Visual Editor
We understand that typography plays a very important role in web content. You may want to use different font sizes to grab your audience’s attention or highlight different sections in a lengthy article.
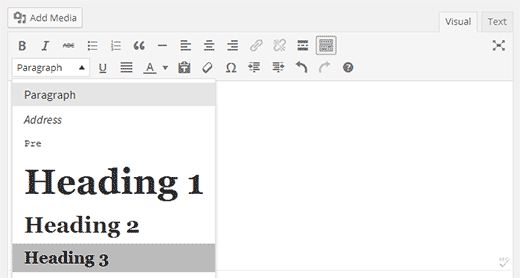
By default, WordPress visual editor allows you to change the font size into paragraph text, headings, etc. If you would like even more font size options then take a look at our guide on how to change the font size in WordPress.
Tip 7. How to Add Columns in WordPress Post Editor
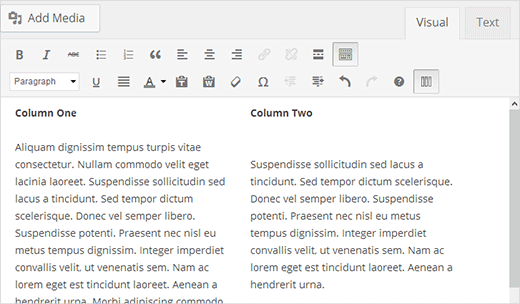
WordPress post editor does not come with a default solution to add multi column content in a post or a page. However you can add multi-column content by switching to Text mode and write the HTML to create columns. Ofcourse that’s not the easiest way to do it.
Well the good news is that you don’t need to write HTML to create multi-column content. See how you can add multi-column content in WordPress posts and pages using the visual editor without writing any HTML or CSS.
Tip 8. Creating Tables in WordPress Posts
Another thing missing from the default WordPress post editor is a button to create tables. Sometimes you may need to insert data tables in WordPress posts.
One way to add tables in WordPress is by using some online table generator, but these tables are not pretty. Luckily there is an easier way to add tables in WordPress posts directly from the post editor. Find out how to add tables in WordPress (no HTML required).
Tip 9. How to Add YouTube Videos in WordPress Post Editor
You should never upload your videos to WordPress. Instead you should use a video hosting service like Vimeo or YouTube to share your video content.
First you would need to upload your video to YouTube (or Vimeo), and then simply paste your video URL in the post editor. Check out detailed instructions in our guide on how to add videos in WordPress.
Tip 10. Switch to HTML Editor
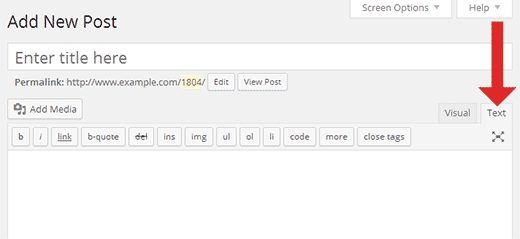
While the visual editor is great for its ease of use, keyboard shortcuts, and visual appearance, don’t underestimate the power of the text editor. Sometimes when you are struggling with image alignment issues or the editor not allowing you to start a new line after adding an image, switching to HTML editor is the fastest solution. Just click on the Text tab on the editor and continue writing.
Tip 11. Adding Buttons Without Using Shortcodes
There are many WordPress plugins that allow you to add beautiful call to action buttons in WordPress using shortcodes. The problem is that your button is not instantly visible in the editor.
What if we told you that you can add buttons and see them exactly as they would look in your WordPress post or pages? Check out this article on how to add buttons in WordPress without using shortcodes.
Tip 12. Check Spelling and Grammar Mistakes
Spelling mistakes and grammar blunders are very common. Editing your own articles is tough and sometimes you just can’t correct all the mistakes by simply re-reading your articles.
Luckily there is a simple solution to overcome this problem. Check out our guide on how to check grammar and spelling mistakes in WordPress for detailed instructions.
Tip 13. Paste as Plain Text
If you paste some content copied from some other web page, TinyMCE will copy the formatting style of the text. To solve this problem you need to press the Paste As Text button in visual editor before pasting your text.
Tip 14: Adding Special Characters
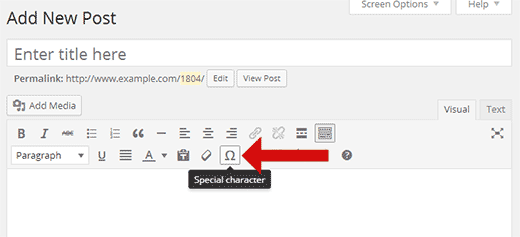
Sometimes you may need to add a copyright, registered and trademark signs in your posts. The easiest way to add these and many other characters is by using the Special Characters button in the post editor.
Simply press the button and a popup containing special characters will appear. Click on the special character you need, and it will appear in the post editor.
We hope these tips helped you master the WordPress visual editor.
Source: WPBeginner.com
[elfsight_social_share_buttons id=”1″]


